CREATING ACTION ITEM:
- STEP 1: Click on the “Action item” option from the left navigation, you will now visit an “Action item List Page”.
- STEP 2: After opening the Action item dashboard you will get the options on the top which are PROJECT, REPORT, DEPARTMENT, USERS, and LIST VIEW (where you can see all the existing action item)
And in the middle you can see one option “CREATE ACTION ITEM”, from there you can create new action item.

- STEP 3: So after clicking on CREATE ACTION ITEM one modal will open which is ACTION ITEM/ NOTE.

- STEP 4 : after clicking on the CREATE ACTION ITEM button you can see your Action item modal, In this modal you can see different options, like
- “Add a title here” – you can add the title of the action item here
- Description – here you can write description about action item
- Attachments – you can add any file (photos/videos) regarding action item
- Due Date – You can select the due date of this action item, for NOTES you do not need due date
- Note & Action item – here you can select either NOTES or Action item
- STEP 5: Now for example if you are selecting NOTES, you will have two options one is SELECT PROJECT and the second one is SELECT REPORT. But here either one of them you can select, for eg. I have selected report “LEADERSHIP #01” here so I cannot select PROJECT. You can also select assignee for this particular note from the dropdown.
- STEP 6: Secondly if you are going to select ACTION ITEM option, you can add DUE DATE for action item, then you can select action item options like “TO DO”, “IN PROGRESS”, “IN REVIEW”, DONE”. After selecting there action items you can select either project or report just like before, and at last you can select assignee. And then click on “CREATE” button.

TODO, means the work assigning by the assigner to assignee which is totally assignee’s responsibility.
IN PROGRESS, here it means the work assigned by an assigner to the assignee is in process or presently going on.
IN REVIEW, it means the assigned work is done and it is in the review process.
DONE, you can find out this step from the name itself, it means the work is done.
- STEP 7: So now you can see in TO DO bucket one action item is active. So I have clicked on the action item one modal will open. So in this modal, you can edit all the existing information, you can post a comment below, you can also UPDATE and ARCHIVE it.

- STEP 8: So now if you (the assignee) wants to start the work, you can simply drag the action item and put it under IN PROGRESS.

- STEP 9: After moving the action item from TO DO to IN PROGRESS, now you can open the action item again, and you can see the ACTION ITEM option, the selected option changed, it is now IN PROGRESS.

- STEP 10: Now same like the previous step, Once the assigned work is done, you can drag the action item from IN PROGRESS to IN REVIEW.

- STEP 11: And lastly when all work and review is done you can drag that Action item to DONE. And most importantly not only one but multiple action items can work under these buckets. So once you are done with your one action item you the assignee will get an award.

- STEP 12: Now in this dashboard, you can see one option on the extreme right upper corner named LIST VIEW. when you are clicking on LIST VIEW option, one new data table will open.

- STEP 13: In this dashboard, you can find all the ACTION ITEMs and NOTEs created by you or admin, In the left, you can see show, entries. And in the extreme right search option is there from where you can search all the action item and notes.
show, from there you can select the number of action item/notes you want to see in one page.
Search, from here you can search for all the action item and notes.
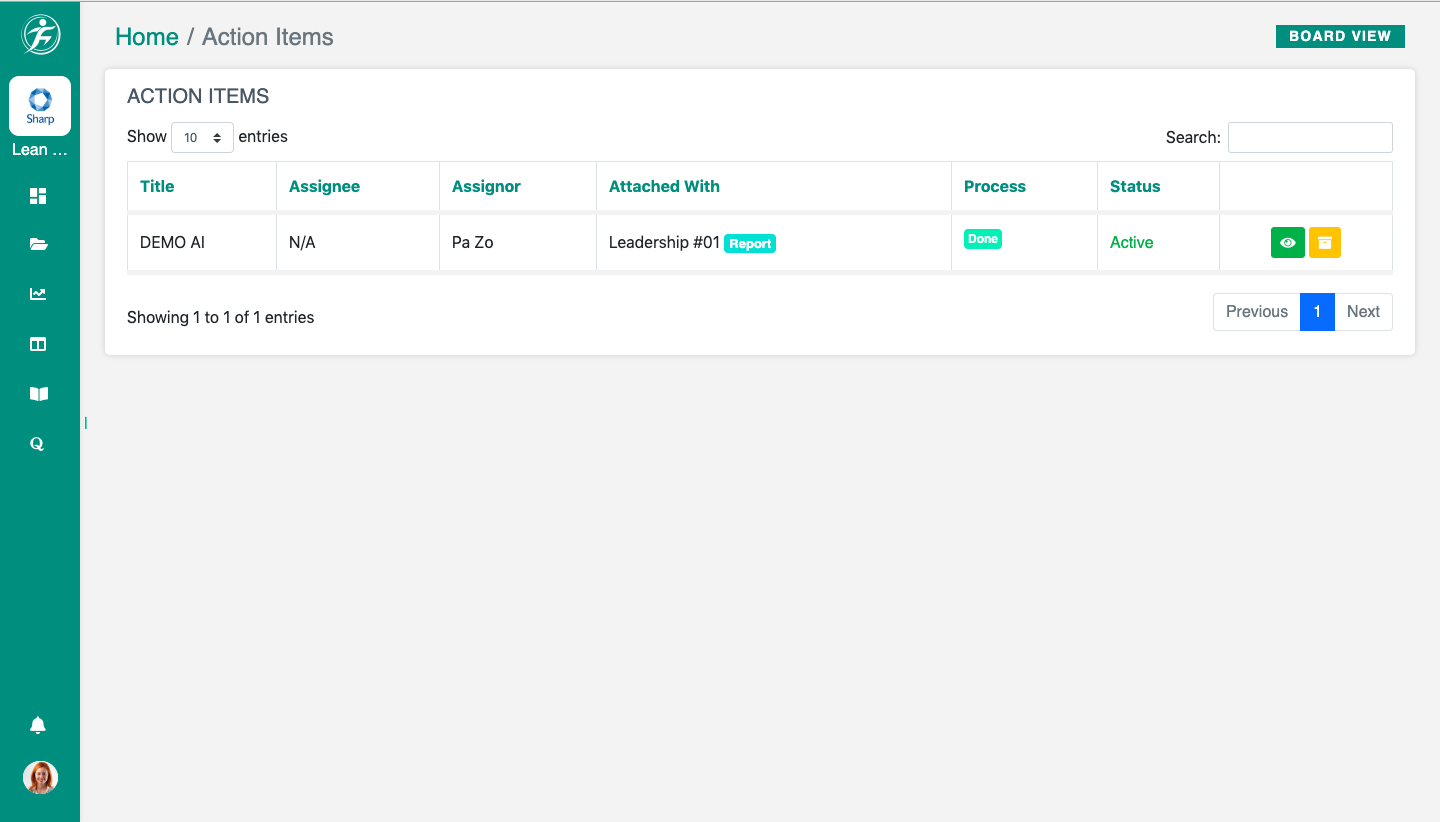
- STEP 14: Now you can see options for action items/ notes like TITLE, ASSIGNEE, ASSIGNOR, ATTACHED WITH, PROCESS, STATUS.
- TITLE, it represents the title I have given for the action item
- ASSIGNEE, here it will show the assignee for the action item
- ASSIGNOR, here it will show the assignor for the action item
- ATTACHED WITH, here you will get either projects or reports, under which the action item have been created
- PROCESS, here you can see in which stage the action item is really are (TO DO, IN PROGRESS, IN REVIEW, DONE)
- STATUS, here you can see the status of the project either it is ACTIVE or ARCHIVED
In the last on this row, you can see two options, the first option is show and the second option is archive.
Because we have completed one action item, so you can only see an action item in the list.

Leave A Comment?