CREATING REPORT :
- STEP 1 : tap on the “Reports” from bottom menu, you will now visit a “Report List Page” (under reports)
- STEP 2 : In the “Report List Page” you will get one filter icon on the top right navigation, by tapping on that icon, where you will get options like, FILTER,PROJECTS,DEPARTMENTS, USERS & All, open completed, archived, and on the right side corner you can see one “+” floating icon, by tapping there you can create a new report.

- STEP 3 : After that tap on the “+” and a selection report list will open. Now select “Stakeholder Analysis” from the entire list, Then you can give a TITLE name (For eg. I have given a Title called “Trial”), now you can also select a “PROJECT NAME” which is the third button. Then finally tap on the “CREATE” button to create this report.

- STEP 4 : On this Stakeholder Analysis dashboard, where you can see on the top right all options

- STEP 5 : To add your collaborator under this report, you can tap on the second option on the top right option which is “COLLABORATORS”, From there you can add as well as remove collaborators
- STEP 6: Inside this report you can see on the page there is a structure where you can see two sides one is “LEVEL OF INFLUENCE/POWER” and “LEVEL OF INTEREST/ATTITUDE”, On “IMPACT OF IMPLEMENTATION” side there are two priorities HIGH and LOW and on “EASE OF IMPLEMENTATION” also there are two priorities HIGH and LOW. And you can see four different topics inside the structure – KEEP INFORMED, MANAGE CLOSELY, MONITOR(MINIMUM EFFORT), KEEP SATISFIED
- STEP 7: Then you can tap on the first option on the structure which is KEEP INFORMED, then one modal will open named “CREATE LABEL,” In this modal, you can add a label and add color on it.
- STEP 8: Like the previous option you can tap on the next option which is “MANAGE CLOSELY,”So again the same modal will open where you can attach a label and add colour on it.
- STEP 9: Like the previous two steps for the rest of the two option I have added label and colour, which you can see on display, the one advantage here is anytime you can drag any of the options and put it on the other priority.
CREATE ACTION ITEMS
- STEP 10: Now in this step you can create an Action Item by tapping on ACTION ITEM/NOTE Option under Action item
- STEP 11: now after tapping on ACTION ITEM list icon one new Action Item list page will open, where you can create new action item by tapping on the “+” floating icon on the bottom right.

- STEP 12: Now when you tapped on the “+” floating icon, one new modal will open where you can see multiple options.
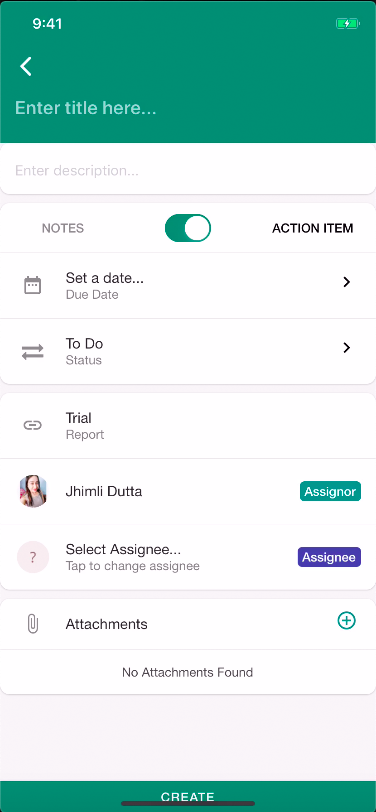
- STEP 13: Now here you can Enter title, Enter description and add attachments (photos or videos) , for eg. here I am entering title as “TRIAL”, Description as “Management work”, and adding one attachment
- STEP 14: while you are creating notes, it will not be visible on the action item board. Here you can select report, select assignee and create the notes
- STEP 15: while you are creating notes, it will not be visible on the action item board. Here you can select report, select assignee and create the notes
- STEP 16: now after creating the action item you can go to action item option from top right navigation there you can see the existing action item which you have created.
COMPLETE THE REPORT
- STEP 17: And finally to complete the report you can go to the upper right navigation and select “MARK THIS REPORT AS COMPLETE” from action to complete this report and you will get an award for the report.
Leave A Comment?